How To: Avoid Chopping Off Patchwork Triangle Points


Troubleshooting patchwork triangles
Many new quilters (and some not-so-new) find that the points are chopped off their triangle patches when they sew their quilts together.
Here are some simple tricks to avoid chopping off the heads of your triangles.
The picture shows a sample Jacob's Ladder block made by a beginner student. Her points are not perfect, but they are pretty good for a new patchworker.
Triangles have pointy points
not 'nubbed' or chopped off ones
It is important to master the sewing of triangular patches into blocks as soon as you can so that you are not disappointed when your quilt top is all finished.
When you sew them, sometimes you are not sewing exactly through what I call the 'X'.
This where all the seams meet, forming an X.
This how the triangle patches should look - when joined together well

This is NOT how the triangle patches should look - when they are joined

When you machine sew patches together
using quarter inch seams
You need to be very careful how you pin the fabrics together.
Below is a video showing the basics of the 'three pin method' of pinning.
Important!
Different step to be taken when joining patches with triangles
Where you see me putting in the positioning pin 1/4 inch down, you put the pin in the X instead.
The 3 pin method for joining patches - in patchwork quilts
Diagram showing triangle square patch - joined to a square patch

Diagram showing a quarter square triangle - with half square triangles joined to it

Easy does it!
Sew the right way up
In order to see the X, you must place the patches together, with the triangle on top.
You then position the paired patches under the sewing machine and sew with a quarter inch seam, making sure to sew EXACTLY through the X on the top patches.
Diagram showing the sewing line - crossing the X when joined to the next patches

Diagram with the sewing line on a 1/4 square triangle - crossing the X in the centre when attaching another patch

Get a quarter inch sewing machine foot
Makes piecing seams perfectly, so very easy.
When you are sewing template free patchwork, the key is to get the seam allowance exactly right. Specialty patchwork feet, with or without a guide flange, help you to keep the patches you are joining together right at the edge of the foot on the right, so the needle is exactly 1/4 inch wide.
If your sewing machine did not come with special quilting/patchwork feet, you need to buy the ones for your machine brand and model.
Otherwise, you may find some generic feet that will work for your sewing machine.

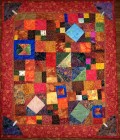
See some of my quilts - at Jan T's Utopia
- Other Quilts by Jan T — Jan T's Utopia
Many of the Quilts by Jan T Not Exhibited Solo are listed in the menus below, while the Exhibitions link in the top menu will take you to those quilts.
© 2012 Jan T Urquhart Baillie


")